EPFO e-Nomination Process: The Employees’ Provident Fund Organization (EPFO) is nominating the relatives of PF account holders to provide social security.
If you haven’t done this yet, please do it as soon as possible because, through this, your family members will be able to withdraw your money in case of your absence.
Since it is being said that despite all efforts, there are many PF account holders who have not added a nominee yet.
In this case, you can visit the EPFO Member Home page and follow the steps provided below to add your nominee without any assistance, allowing you to do it from the comfort of your home.
Guide to Adding e-Nomination in Your EPFO Account
If you want to add EPFO e-nomination, you can follow the steps below:-
- First, you will need to visit the official website of EPFO – https://www.epfindia.gov.in/.
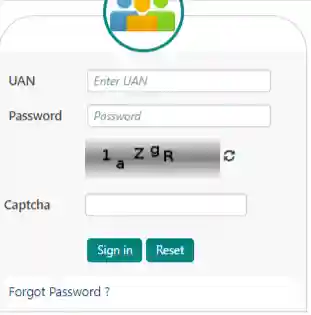
- Thereafter, go to “Online Services”, available on the homepage, and log in or sign in by using your UAN number and password.
- Upon doing that, another page will open, and on the menu bar, click on “View.” Then, you will see some options appear as a drop-down menu, from which you will need to click on the “Profile” option.

- After doing this, all your information will appear in front of you, and first, you will check your personal details and address. The most important thing is that your photo should definitely be there. If it’s not, you can upload it.
- Thereafter, while reviewing more information, you will also need to update your marital status.
- Then, you will have to update your permanent address, i.e., your complete address, then click on the “Submit” button. This way, your profile details will be complete.

- Thereafter, you will need to click on “Manage” at the top. When you click on it, you will see some options in the drop-down menu, from which you will have to click on the option labeled “E-Nomination.”

- After clicking, you will be taken to the profile page, and then you will have to click on the “Proceed” button located below it.
- After this, a page for family declaration will appear in front of you, where you will have to select “Yes” or “No” in the “Having Family” section at the top.

- Thereafter, a page will open, and you will need to fill in the nominee’s information based on the Aadhaar card. If you don’t provide information consistent with the Aadhaar card, you may see an error page.
- Therefore, you should fill in the information exactly as it appears on the Aadhaar card.
- Therefore, on the page with the nominee information, you will need to provide the nominee’s Aadhaar card number, their name, date of birth, your relationship with the nominee, as well as their complete address, in addition to uploading a photo.
- After this, you will have to click on “Save Family Details” while checking the box below. If you want to add another nominee, you can select “Add Row” in the button below.

- Thereafter, the nominee’s information will be saved. Then, if you scroll down a bit, you will see a section called “EPF Nomination.” In this section, you will see all the details of the nominee. Check the “Select” checkbox located below.
- Next, in the “Total Amount Of Share,” you will need to write 100. If you have selected more than one nominee, you can divide 100 accordingly. After this, you will need to click on the “Save EPF Nomination” button at the bottom.

- After doing this, your EPF details will be saved successfully. After this, you will see “Pending Nomination” in front of you. You can click on “View” to see it, or click on “Delete” to remove it if you wish. In this, you will have to click on the option “E Sign.” If an error occurs when you click, there’s no need to worry. EPFO often generates errors, and you can try again after some time.
- After this, EPFO’s e-signature page will appear. Here, you will need to check the checkbox located below.

- Upon doing this, your page will directly navigate you to the Aadhaar authentication page.
- After this, you will have to enter the Aadhaar card number of the PF member, and then, you will have to click on the “GET OTP” button located below.
- Then, you will receive a One-Time Password (OTP) on your registered mobile number. You have to enter this OTP in the box provided below. Thereafter, while checking the checkbox below, you need to click on the “Submit” button.
- Upon doing this, a page will open with many visible dots. You will need to click on the topmost dot.

Upon doing this, you will see the option for “Nomination Successful,” and you can view it. Afterward, if you wish, you can create a sign of document below the “Nomination Details” section. For that, you have to click on it and upon doing this, all the information will be available to you in the PDF format.
Watch Video